Why is it that the flavors of some dishes come through so deliciously while others seem flat?
Using a simple technique to extract more flavor from spices may be the answer.
Either through reading my posts or attending my classes, you may recall that I strongly suggest checking your spices regularly for freshness. To have any success with seasoning our cooking, starting with fresh spices is a key point. Now, let’s do a deeper dive into building flavor with another culinary tip. To extract more flavor from spices and better distribute and infuse them into the dish, “bloom” them.
WHAT DOES IT MEAN TO “BLOOM” SPICES?
Blooming spices (sometimes referred to as “tempering”) is an easy-to-do cooking technique commonly used in South Asian cuisine. I like to think of it as a step beyond “toasting” spices. Blooming happens early in the cooking process and involves heating whole or ground spices in some type of fat before adding other ingredients, especially liquids.
WHY IS IT AN EFFECTIVE TECHNIQUE?
Most spices contain fat-soluble compounds. When partnered with heated fat, spices are able to release those compounds and extract more flavor. The infused fat helps distribute the flavor more evenly and deeply throughout the dish.
The benefits extend beyond the pan, which is our ultimate goal! The infused cooking fat also coats our tongues when we are eating, providing the fullest effect for our taste buds.
WHAT TYPE OF FAT SHOULD I USE TO BLOOM SPICES?
When choosing a fat to bloom spices, consider if you wish that fat to add flavor to the dish (such as with coconut oil, nut or seed oil, butter or ghee, and some olive oils) or provide a lighter or more neutral base for the seasonings (such as avocado oil, canola oil, or lighter olive oils). The fat used should complement the spices and other ingredients that will be added to the dish.
And, don’t forget to consider the heat tolerance, or smoke point, of the fat based on how the dish is being prepared. Choose a good quality high heat oil for stir fries and other high heat cooking processes, and lower heat fats for a slow-cooked stew, soup or braise.
To learn more about the smoke point of cooking oils and other fats, check out “Smoking Points of Cooking Fats and Oils” by The Spruce Eats.

DO I USE WHOLE OR GROUND SPICES?
Both whole and ground spices can be used in the blooming process. There are two approaches when using whole spices – remove or strain them out of the oil once they are bloomed, or leave them in to add texture to the dish. If leaving whole spices in the dish, choose those which are pleasant to bite into such as cumin seeds, fennel seeds, or mustard seeds. Ground spices bloom very quickly and tend to burn more easily than whole spices. Keep the heat lower and stir frequently.
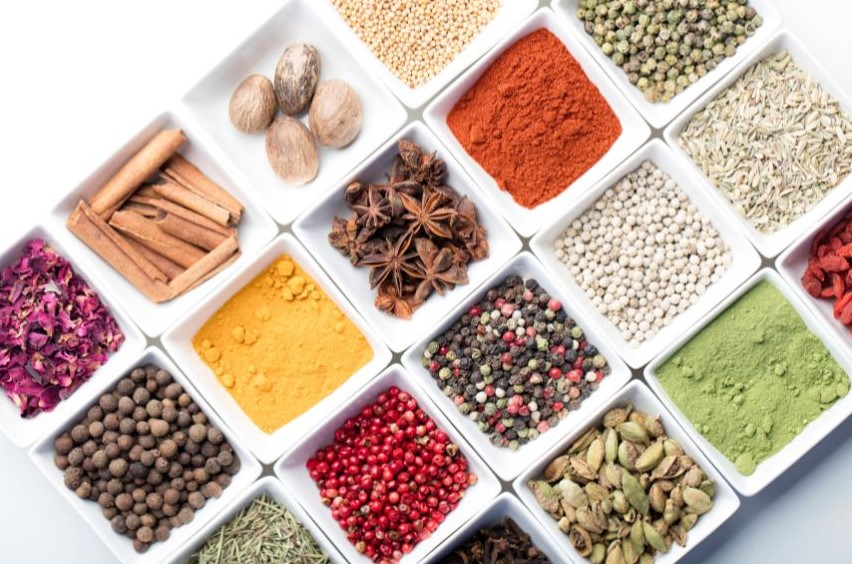
Whether using whole or ground, here are a few spices that lend themselves nicely to blooming:
- cardamom pods or seeds (whole or crushed)
- chili powder, dried chili peppers, red pepper flakes
- cinnamon
- cloves
- coriander
- cumin seeds
- curry leaves
- curry powder
- fennel seeds
- fenugreek seeds
- garlic cloves
- ginger (powdered, minced, or fresh peeled)
- mustard seeds
- paprika (watch carefully, can burn easily)
- star anise (whole pods or crushed)
- turmeric
The same process can be used to extract more flavor from fat-soluble fresh or dried herbs such as bay leaves, rosemary, lavender, sage, thyme, and savory. Bloom them alone or along with spices. Dried herbs further benefit from rehydrating in any liquid added later in a recipe.
CAN I BLOOM SPICES IN WATER OR ANOTHER LIQUID?
Spices will release some flavor when simmered in water or another liquid, yet not nearly as much as when heated in oil. Think about how garlic quickly emits a wonderful aroma when placed in hot oil, spices do the same. If you are uncertain about the effects of blooming spices vs. simmering them in liquid, consider this information from Cook’s Illustrated:
“We’ve long advocated ‘blooming’ spices and certain herbs in oil or fat before adding liquid to the pot, which our tastebuds tell us extracts more of their flavors. But we wondered if we could get a more objective assessment of blooming’s impact. After testing crushed red pepper flakes and dried thyme separately in both oil and water, then having them analyzed by a food lab, we found some surprising results.
The pepper-infused oil had a stronger flavor, with more than double the amount of heat-producing capsaicin than the pepper-infused water.
The results for thyme were even more dramatic: The herb-infused oil contained 10 times as much thymol (the flavor compound) as the herb-infused water.”
(Practical Science – Blooming Spices. Cook’s Science. America’s Test Kitchen, 2016, page 256)

HOW TO BLOOM SPICES
Rest assured, blooming spices is a quick and easy technique to learn. In fact, you may already have been doing it and just did not realize it.
Blooming is done early in the cooking process and simply involves heating the spices in oil for several seconds before adding liquids and most other ingredients. The most important part is to stay close by so as not to burn the spices. Burnt spices will permeate an entire dish – not exactly the desired result!
While not all recipes are written using the blooming technique, it’s easy to adjust to doing so. Use one of these two approaches:
- Any sturdier aromatics such as onions, carrots, celery, and bell peppers, can be sauteed first before adding the spices and garlic. For example, when making chili, I saute the sturdy onions, carrots, and peppers first, then add the spices and garlic to the pan before adding other ingredients.
- If a recipe calls for tender, quick-cooking aromatics such as leeks, scallions, or shallot, the spices can be added to the oil at the same time. For example, if I am making a sauce that calls for diced or minced shallots, I saute the shallots, spices, and garlic together in the oil since they cook at about the same time as it takes to bloom the spices.
In either scenario, I stir the mixture constantly, allow the spices to bloom for about 30 – 60 seconds, then continue with the recipe, adding the liquids, proteins, or other ingredients. That’s it!
TIPS:
- Use medium or medium-low heat, as the spices can burn easily.
- Add just a little more of the fat than is called for in the recipe, unless the recipe is written to bloom the spices.
- Stir the mixture so that the oil coats the spices, and any vegetables that may be in the pan.
- The process is quick so keep a close eye and use the smell test. It only takes about 20 – 30 seconds for ground spices to smell fragrant in oil alone, or 30 – 60 seconds when added with garlic to sauteed veggies.
- The spices may darken in color slightly, just watch so that they are not burning.
- Have liquids and other ingredients ready to add to the pan once the spices are bloomed.
ONE MORE IDEA
How about going just a bit further and creating an infused oil? This option creates a small amount of seasoned oil that can be stored and in more than one application. It’s another way to effectively intensify seasonings throughout a dish.
INSTRUCTIONS
1. Heat a small skillet over medium to medium-low heat. Add 1/2 cup of a high smoke point oil (such as avocado or canola) to the pan. When heated and shimmering, add a few of any desired whole spices.
Here are a few ideas:
- a small piece of cinnamon stick
- a few cardamom pods, coriander seeds, curry leaves, cumin seeds, and/or cloves
- a small piece of ginger root or turmeric root
- a clove of garlic
- a bay leaf
Choose one spice or a combination that complements each other.
2. Stir to evenly distribute and cook for 2 – 3 minutes, until the mixture is fragrant. Watch carefully so as not to burn the spices.
3. Remove the pan from the heat and allow to cool. Strain the oil into a glass storage container. Once cooled, cover it tightly and store it in the refrigerator until ready to use. Once refrigerated, the infused oil will last approximately 2 – 3 weeks.
Use the infused oil just as you would any plain oil – to sauté vegetables, cook proteins, to stir-fry, drizzle over a serving of soup or stew, add to a sauce or dip, use in a vinaigrette or a marinade.
© 2022 Love + Craft Kitchen, LLC, All Rights Reserve
Photos from Getty Images


Recent Comments